Sunday, December 7, 2014

Knitting Pattern: Boot Cuffs with Cable Pattern


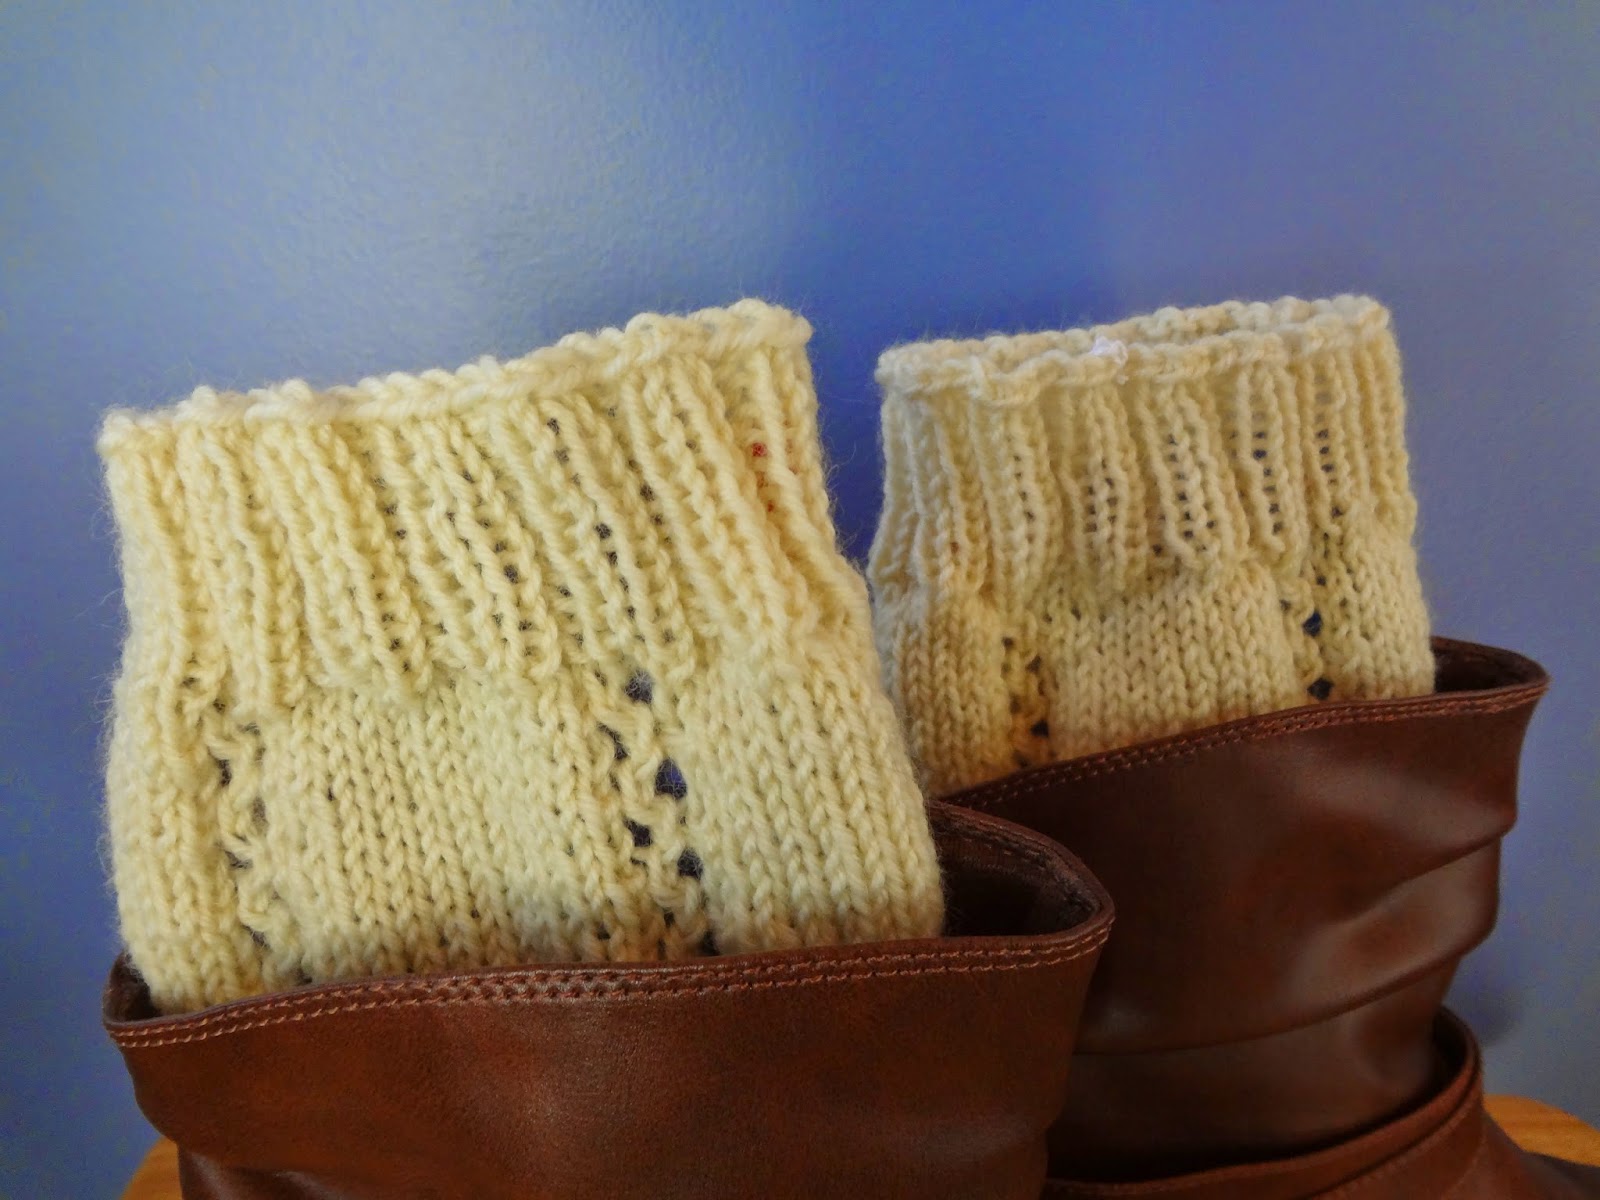
Here is another pattern I cooked up for boot cuffs. It features a simple cable pattern that repeats to make four cables on each boot cuff. Enjoy!


Materials:
Size 6 US circular needles or DPNs

Worsted weight yarn. I used LB Collection® Organic Wool Yarn (100% organic wool), the color is Redwood (1 skein)
Cable needle
Needle for weaving in ends
Stitch Markers (4)

Gauge:
4 sts = 1"

Finished Measurements:
Circumference: approximately 9" unstretched
Length: approximately 6 3/4"

Cable pattern:
C4B: place two sts onto cable needle and hold in back, knit the next two stitches, knit the two stitches from the cable needle

Instructions (make two):
CO 48 stitches
(if using DPNs, divide stitches between 4 needles, 12 stitches on each needle)
Work in K2 P2 ribbing for 11 rows

Pattern:
Row 1: *K2, P2, K4. P2, K2, place marker, repeat from * until end of row
Rows 2 and 3: *K2, P2, K4, P2, K2, slip marker, repeat from * until end of row
Row 4: *K2, P2, C4B, P2, K2, slip maker, repeat from * until end of row

Repeat rows 1-4 four times, 20 rows in pattern total (not counting ribbing)
Work in K2 P2 ribbing for 9 more rows
Bind off in knit
Weave in ends

Tips:
When using circular needles with stitch markers, use a different colored stitch marker at the beginning of the round, or tie a small piece of yarn to it to distinguish it from the other stitch markers. That way you won't loose track of which row you are working!

Also, if you are using DPNs, use a stitch marker to mark the beginning of the row, but there is no need to use stitch markers between sections because they are already divided for you! 

To switch up the pattern a bit, use C4F (Slip two stitches onto cable needle, hold in front. Knit the next two stitches, then knit the stitches on the cable needle) instead of C4B on the second boot cuff so that the cable patterns twist opposite directions.

Please message me if you see mistakes or need clarification! Happy knitting!


Saturday, November 29, 2014

Knitting Pattern: Boot Cuffs with Simple Lace Pattern


I have become obsessed with making boot cuffs lately. I made a pair for myself and loved them, and then made some more and sold out of them at my last craft fair. I was making a simple pattern boot cuff with just stockinette and ribbed stitching, but recently I have been switching it up a little and starting to create my own variations. Here is a pattern for one of the variations I made, it uses a simple lace pattern to add some elegance. Enjoy and please message me if you see mistakes or need clarification! Happy knitting!

Materials:
Size 6 US circular needles or DPNs
DK weight yarn. I used Paton's Classic DK Superwash Wool (100% wool), the color is Aran (2 balls)
Needle for weaving in ends
Stitch Marker

Gauge:
9 1/2 sts = 2"in stockinette

Instructions:
CO 52 sts. Place marker and join, careful not to twist sts.

Work in K2 P2 ribbing for 14 rows

Pattern rows:
Row 1: *K 11, K 2tog, YO, repeat from * to end of row
Row 2: K all stitches
Row 3: *K11, YO, Slip 1 as if to K, K1, PSSO the K st, repeat from * to end of row
Row 4: K all stitches

Repeat rows 1 to 4 four more times (20 rows total in pattern).

Work in K2 P2 ribbing for 10 more rows.

Bind off in K.
Weave in ends.

Finished Measurements:
Circumference: approximately 11" unstretched
Length: approximately 7"


Last Weekend's Craft Fairs

Here are some pictures from the craft fairs last weekend. I had a great time at both, and my sales are really starting to pick up! I completely sold out of leg warmers and boot cuffs, so I am spending my time now making more.

New Searles Holiday Fair in Nashua, NH:


Roudenbush Community Center Holiday Shoppe in Westford, MA:


This is the raffle prize I donated

Coming up next!!

Find the event info here!


Tuesday, November 4, 2014

Feelin' Good at Mill No. 5

Here are some photos from this past Sunday. There was a good crowd, and I made decent sales, plus a lot of people took my business card. I learn something new every time I participate in one of these events. One of the most important things I have learned so far is that how you display your items is everything. My display is always a work in progress. One of the most eye catching parts of my display is the mannequin legs, I get a lot of comments about them. I also put my mittens up front so that people can try them on easily. I am still working on how best to display my hats. Another addition was the socks display, which also got a lot of good comments.


Next on up is the Team Tutas Craft fair this Saturday in Nashua.


Then after that on November 22, is the New Searles Holiday Fair, also in Nashua!


Monday, October 6, 2014

Knitting Pattern: Interlocking Gears Hat


As you can see from my previous post, I have been on a hat making craze lately. This one I completed last night. The pattern looks to me like interlocking gears, hence the name I gave the hat. Here is the pattern, enjoy! 

Materials:
Size 3 US circular needles or DPNs
 
Super fine yarn. I used Loops and Threads Woolike, an 85% acrylic, %15 nylon yarn, 2 different colors (A and B), 1 ball of each. The colors I used are mauve (A) and rose (B). 
Needle for weaving in ends

Gauge:
15 sts = 2" in pattern

Instructions:
CO 120 stitches with color A, place marker and join, careful not to twist stitches.

With A, K 2 rows
With A, work K3, P3 pattern for 2 1/2" 

Pattern rows:
**With A, K 5 rows
Add color B
Next row: *K2 with A, K2 with B, repeat from * to end of row
Repeat last row 1 time
With B, K 5 rows
Next row: *K2 with B, K2 with A, repeat from * to end of row
Repeat last row 1 time

Repeat all rows from ** 2 times
With A, K 5 rows

Decrease rows (all knit with color A): 
(switch to DPNs when necessary)
Row 1: *K6, K2tog, repeat from * to end of row
Row 2: K 1 row
Row 3: *K5, K2tog, repeat from * to end of row
Row 4: K 1 row
Row 5: *K4, K2tog, repeat from * to end of row
Row 6: K 1 row
Row 7: *K3, K2tog, repeat from * to end of row
Row 8: K 1 row
Row 9: *K2, K2tog, repeat from * to end of row
Row 10: *K1, K2tog, repeat from * to end of row
Rows 11-12: *K2tog, repeat from * to end of row
Cut yarn and weave remaining through remaining stitches, secure tightly and weave in ends
Weave in rest of the ends

Tips:
Make sure you do not break the yarn but carry it up the work as you go. 
If any clarification is needed or you see any mistakes, please message me! Thanks and happy knitting!


Etsy listing for this hat can be found here